


Learning by Doing
Joyful experimentation while erasing writer's block
We all struggle at times
People talk about writer’s block is if it’s a specific, horrific thing.
First, don’t let writers convince you that we are unique. How arrogant would that be? Most of us get stuck at times, with whatever we’re trying to do. Making art, writing, starting or finishing a work project... I don’t think anyone enjoys that feeling.
It usually passes, one way or another. We can take steps to get unstuck more quickly or just wait it out. We have options.
Having fun breaking free
There are dozens of tips on how to get past this. Walk around the block, change your environment, do a household task, etc. All can help.
But if possible, why not have some FUN in the process?
I’m not sure where I discovered the technique known as Pep Ventosa; it might have been from Tomasz Trzebiatowski’s Photosnack. But a very talented and generous photographer, Alan Brown, shares how to do it in detail here. For those who already understand and enjoy multiple exposure techniques, Pep Ventosa is very different from the excellent collaboration of Susanne Helmert and perfectlight; if you missed that, click here.
I decided I would try the Pep Ventosa technique when I was stuck staring at my stupidly long To-Do List (I didn’t have to wait long). Or maybe if inspiration struck. Stuck or struck, one of the two.
Initial results
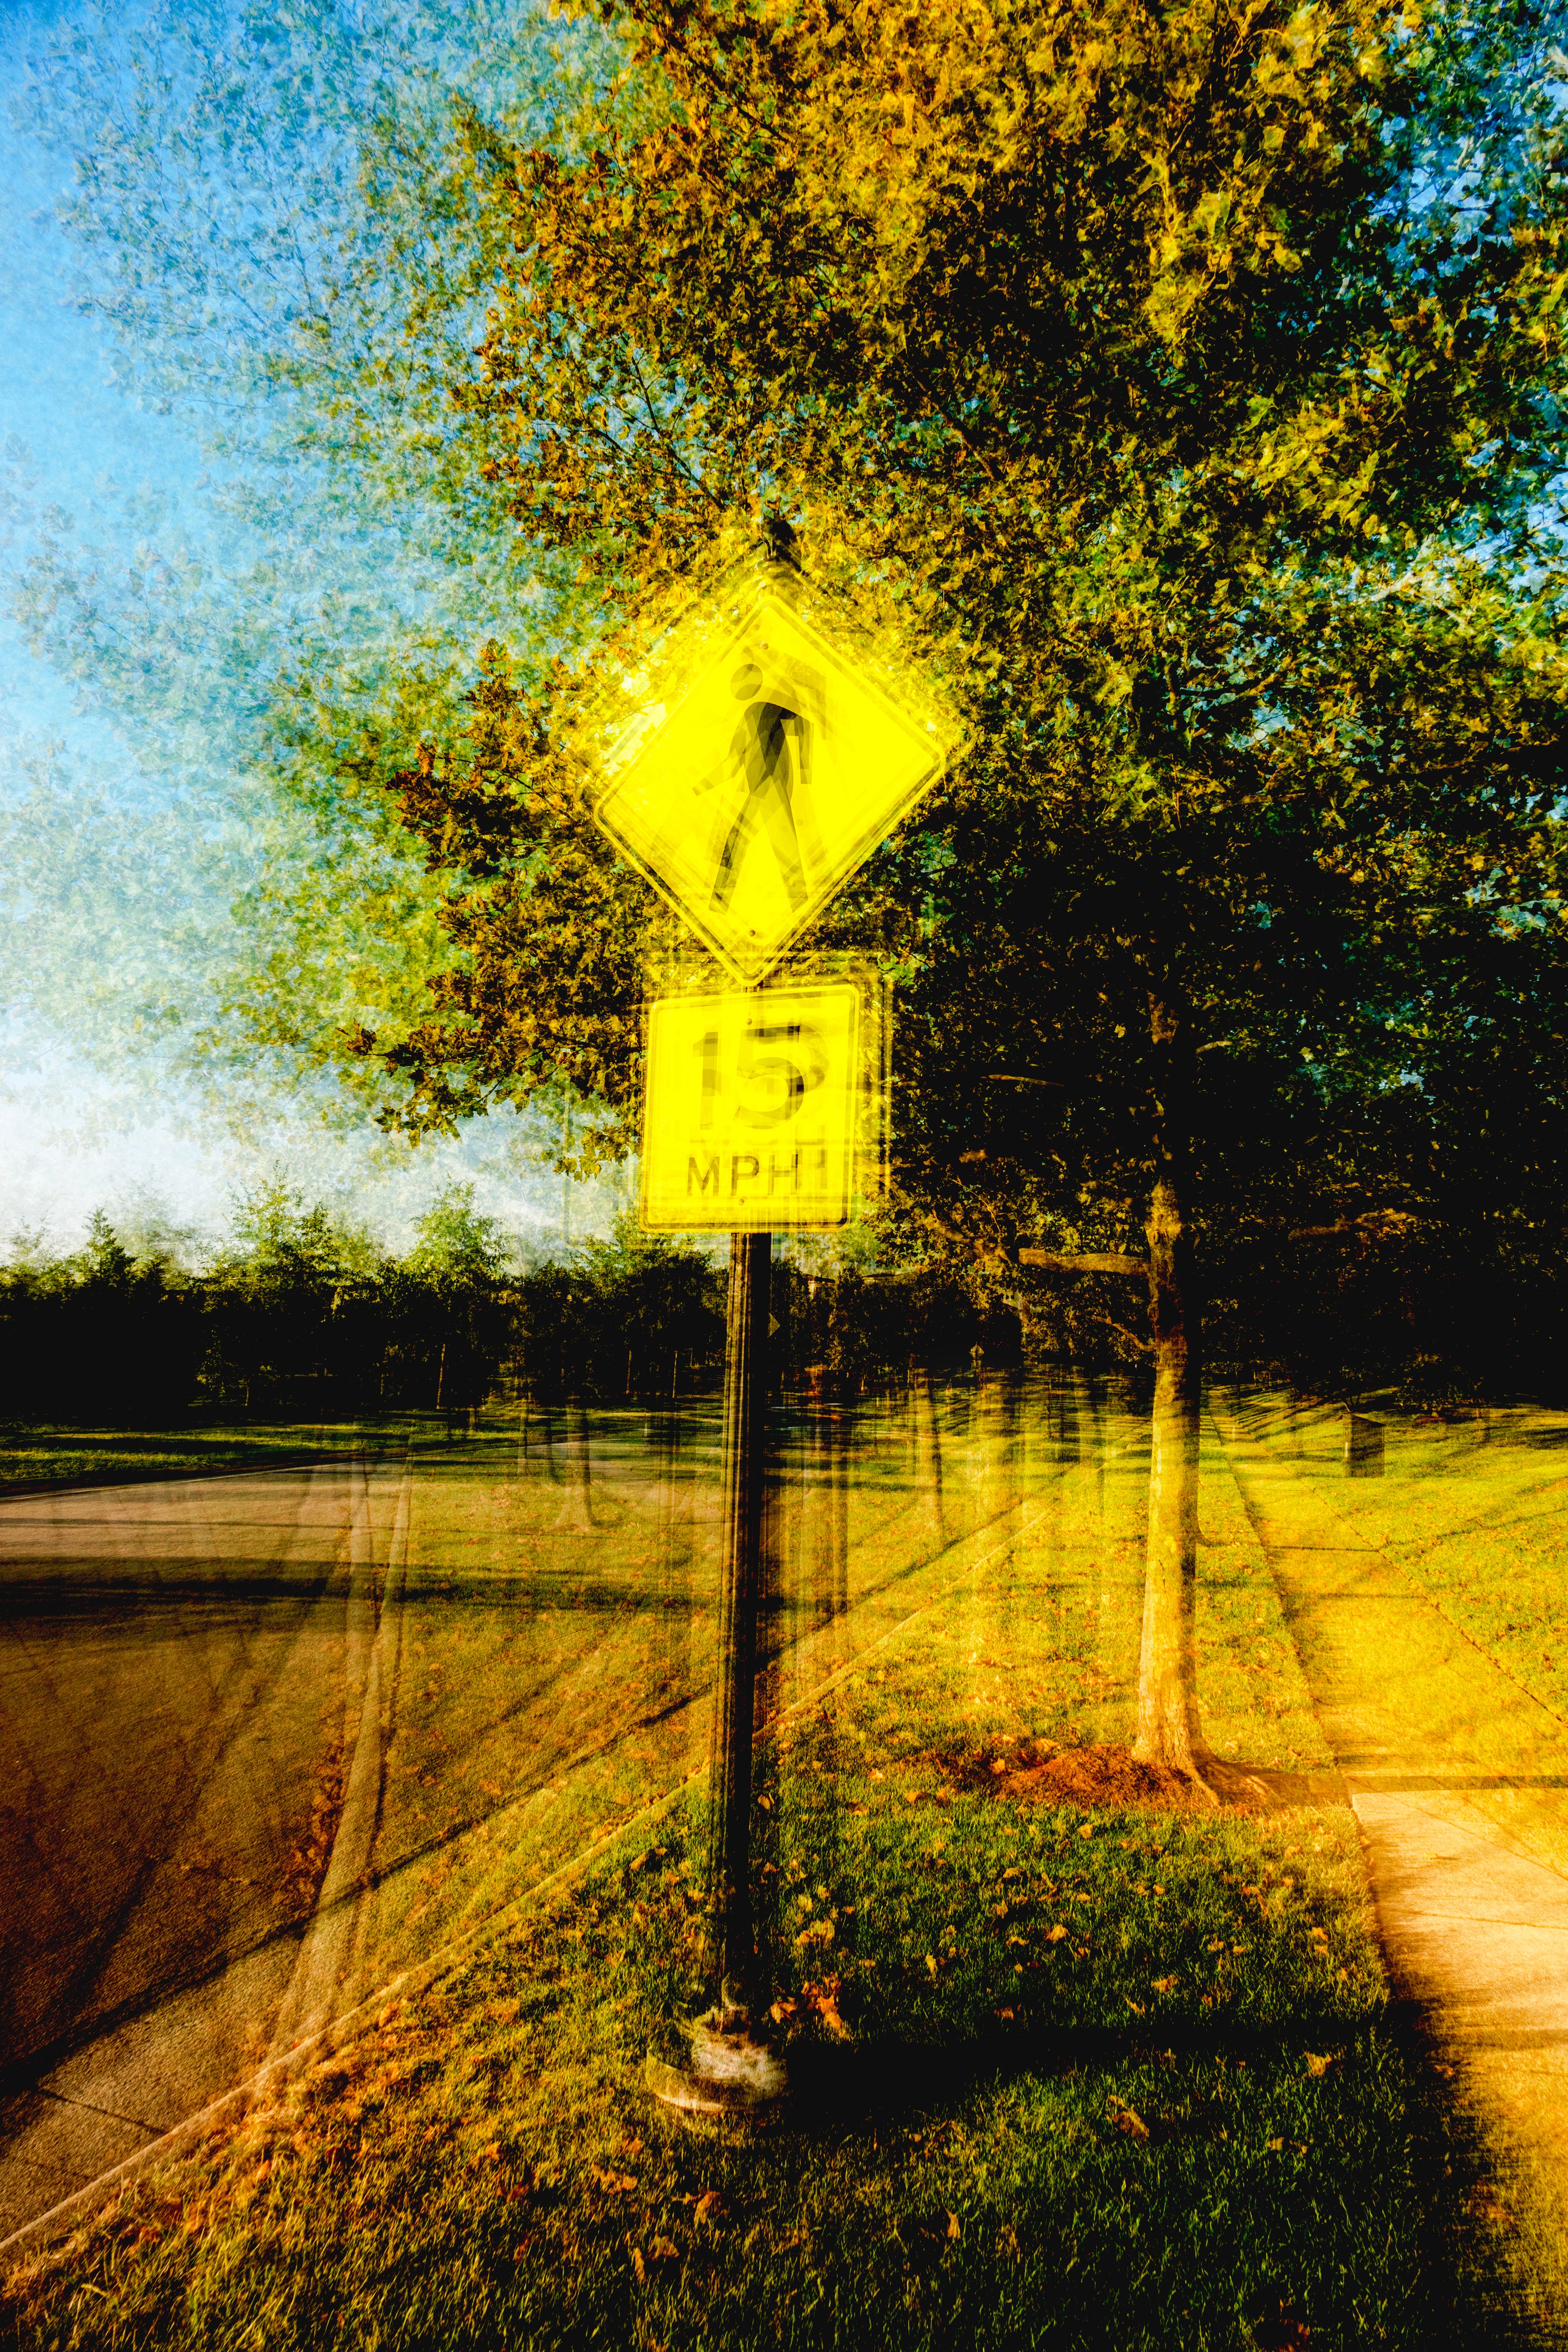
In my first attempt I didn’t follow all the steps. I just wanted to see roughly how it works. I also didn’t carefully select a subject. I just ran across the street to find a vertical line to photograph, and chose a street sign. After I loaded the shots into my computer I also didn’t bother to align all the images carefully. My only goal was to quickly learn about the blending techniques.
But even with that limited scope, beyond enjoying myself, I stumbled into the discovery that, if I want to create an unsettled feeling from a common scene, this technique can really pull it off.
Food for thought.
Now unstuck and refreshed, I went back to the paid project I was supposed to be working on.
The next time
The next time I went out to try this, it was again just a break in the day. We had some pretty yellows in the trees across the street, but it was high noon, so the light was harsh. I decided to embrace the harshness rather than beauty. I asked Stacia to be a model and put on an all-black outfit, along with a black beanie hat. That way only her face would really be highlighted, with strong shadows and sharp angles to cheekbones and eye sockets. I wondered if we could create an interesting effect, and I knew it would take just 15 minutes to capture the images, including wardrobe changes. Later when I sat down to merge all the exposures I also converted them to black and white to emphasize spookiness, and it became this:
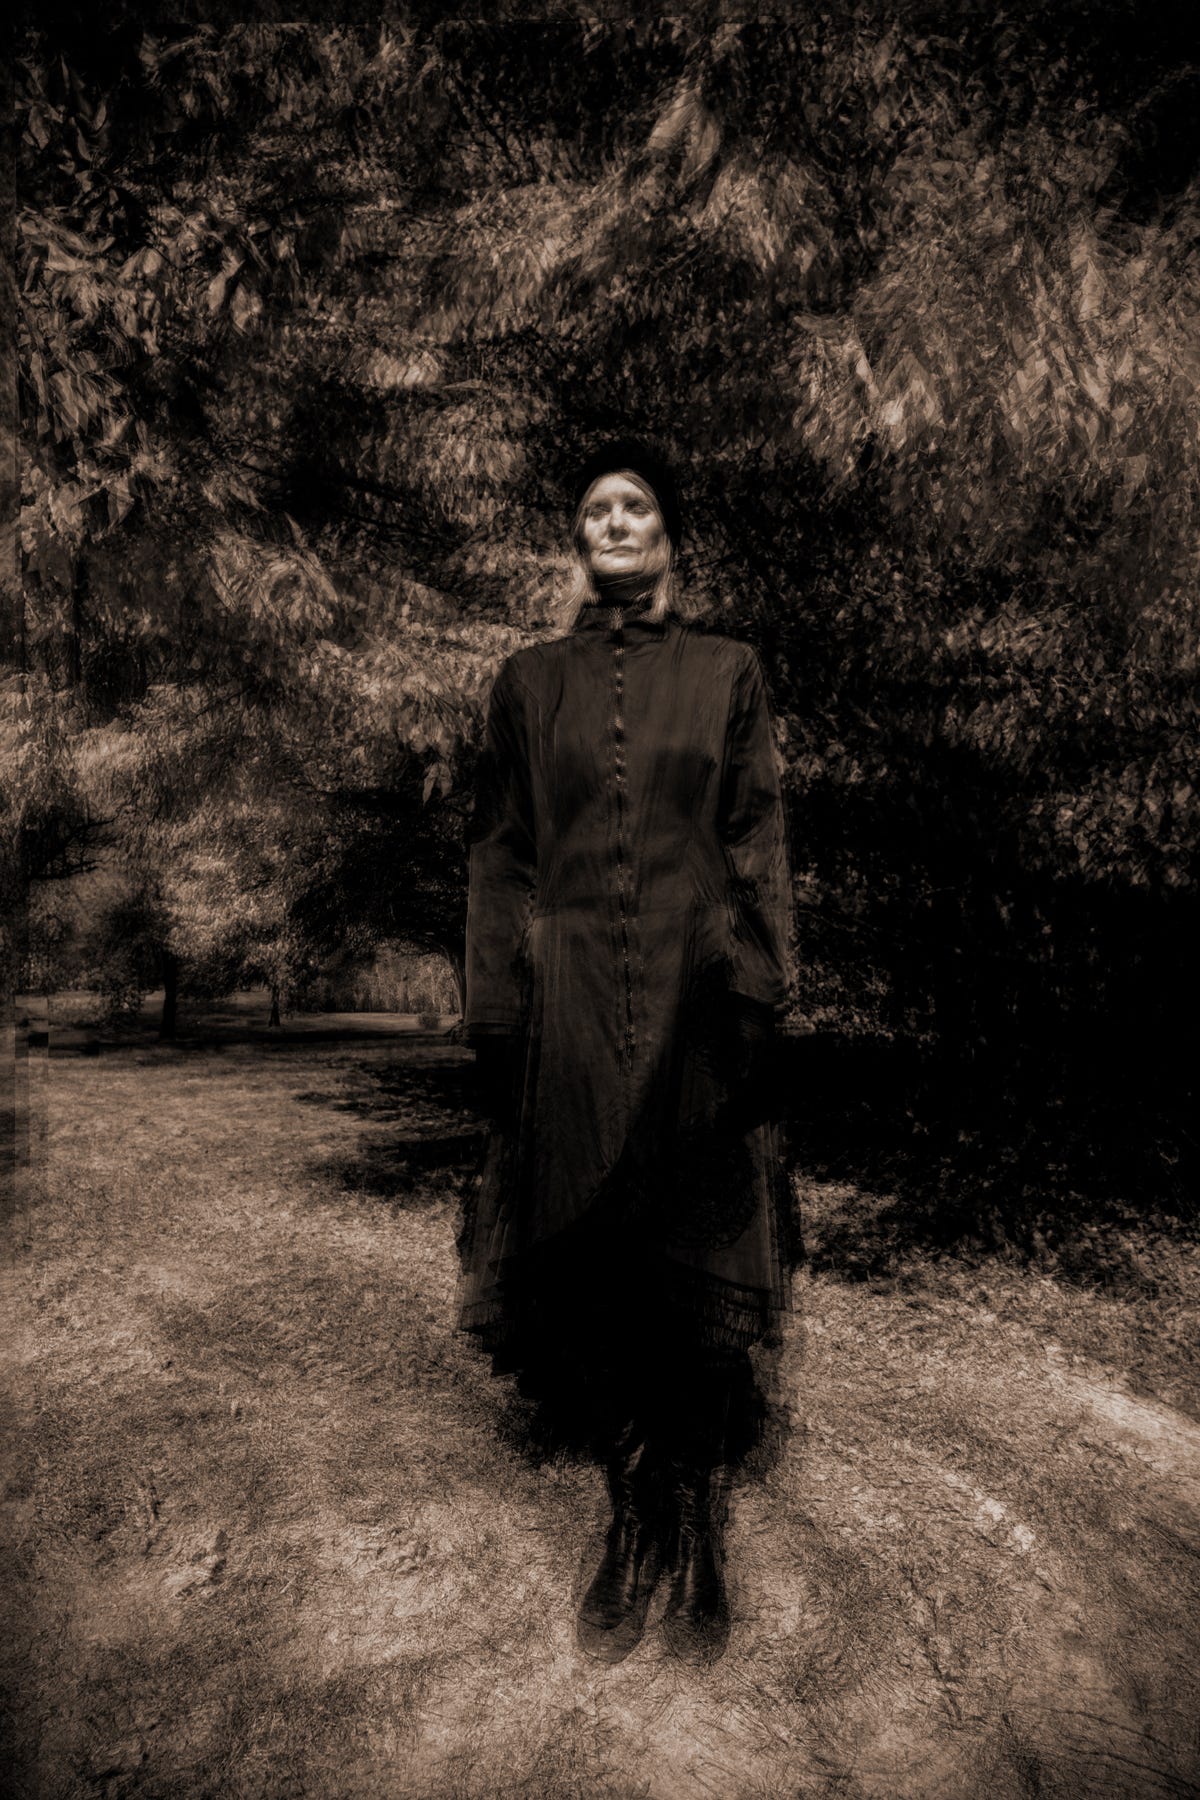
Discovery number two is that this technique can easily be used for a haunting style of imagery.
And once again refreshed, I went back to my lengthy lists.
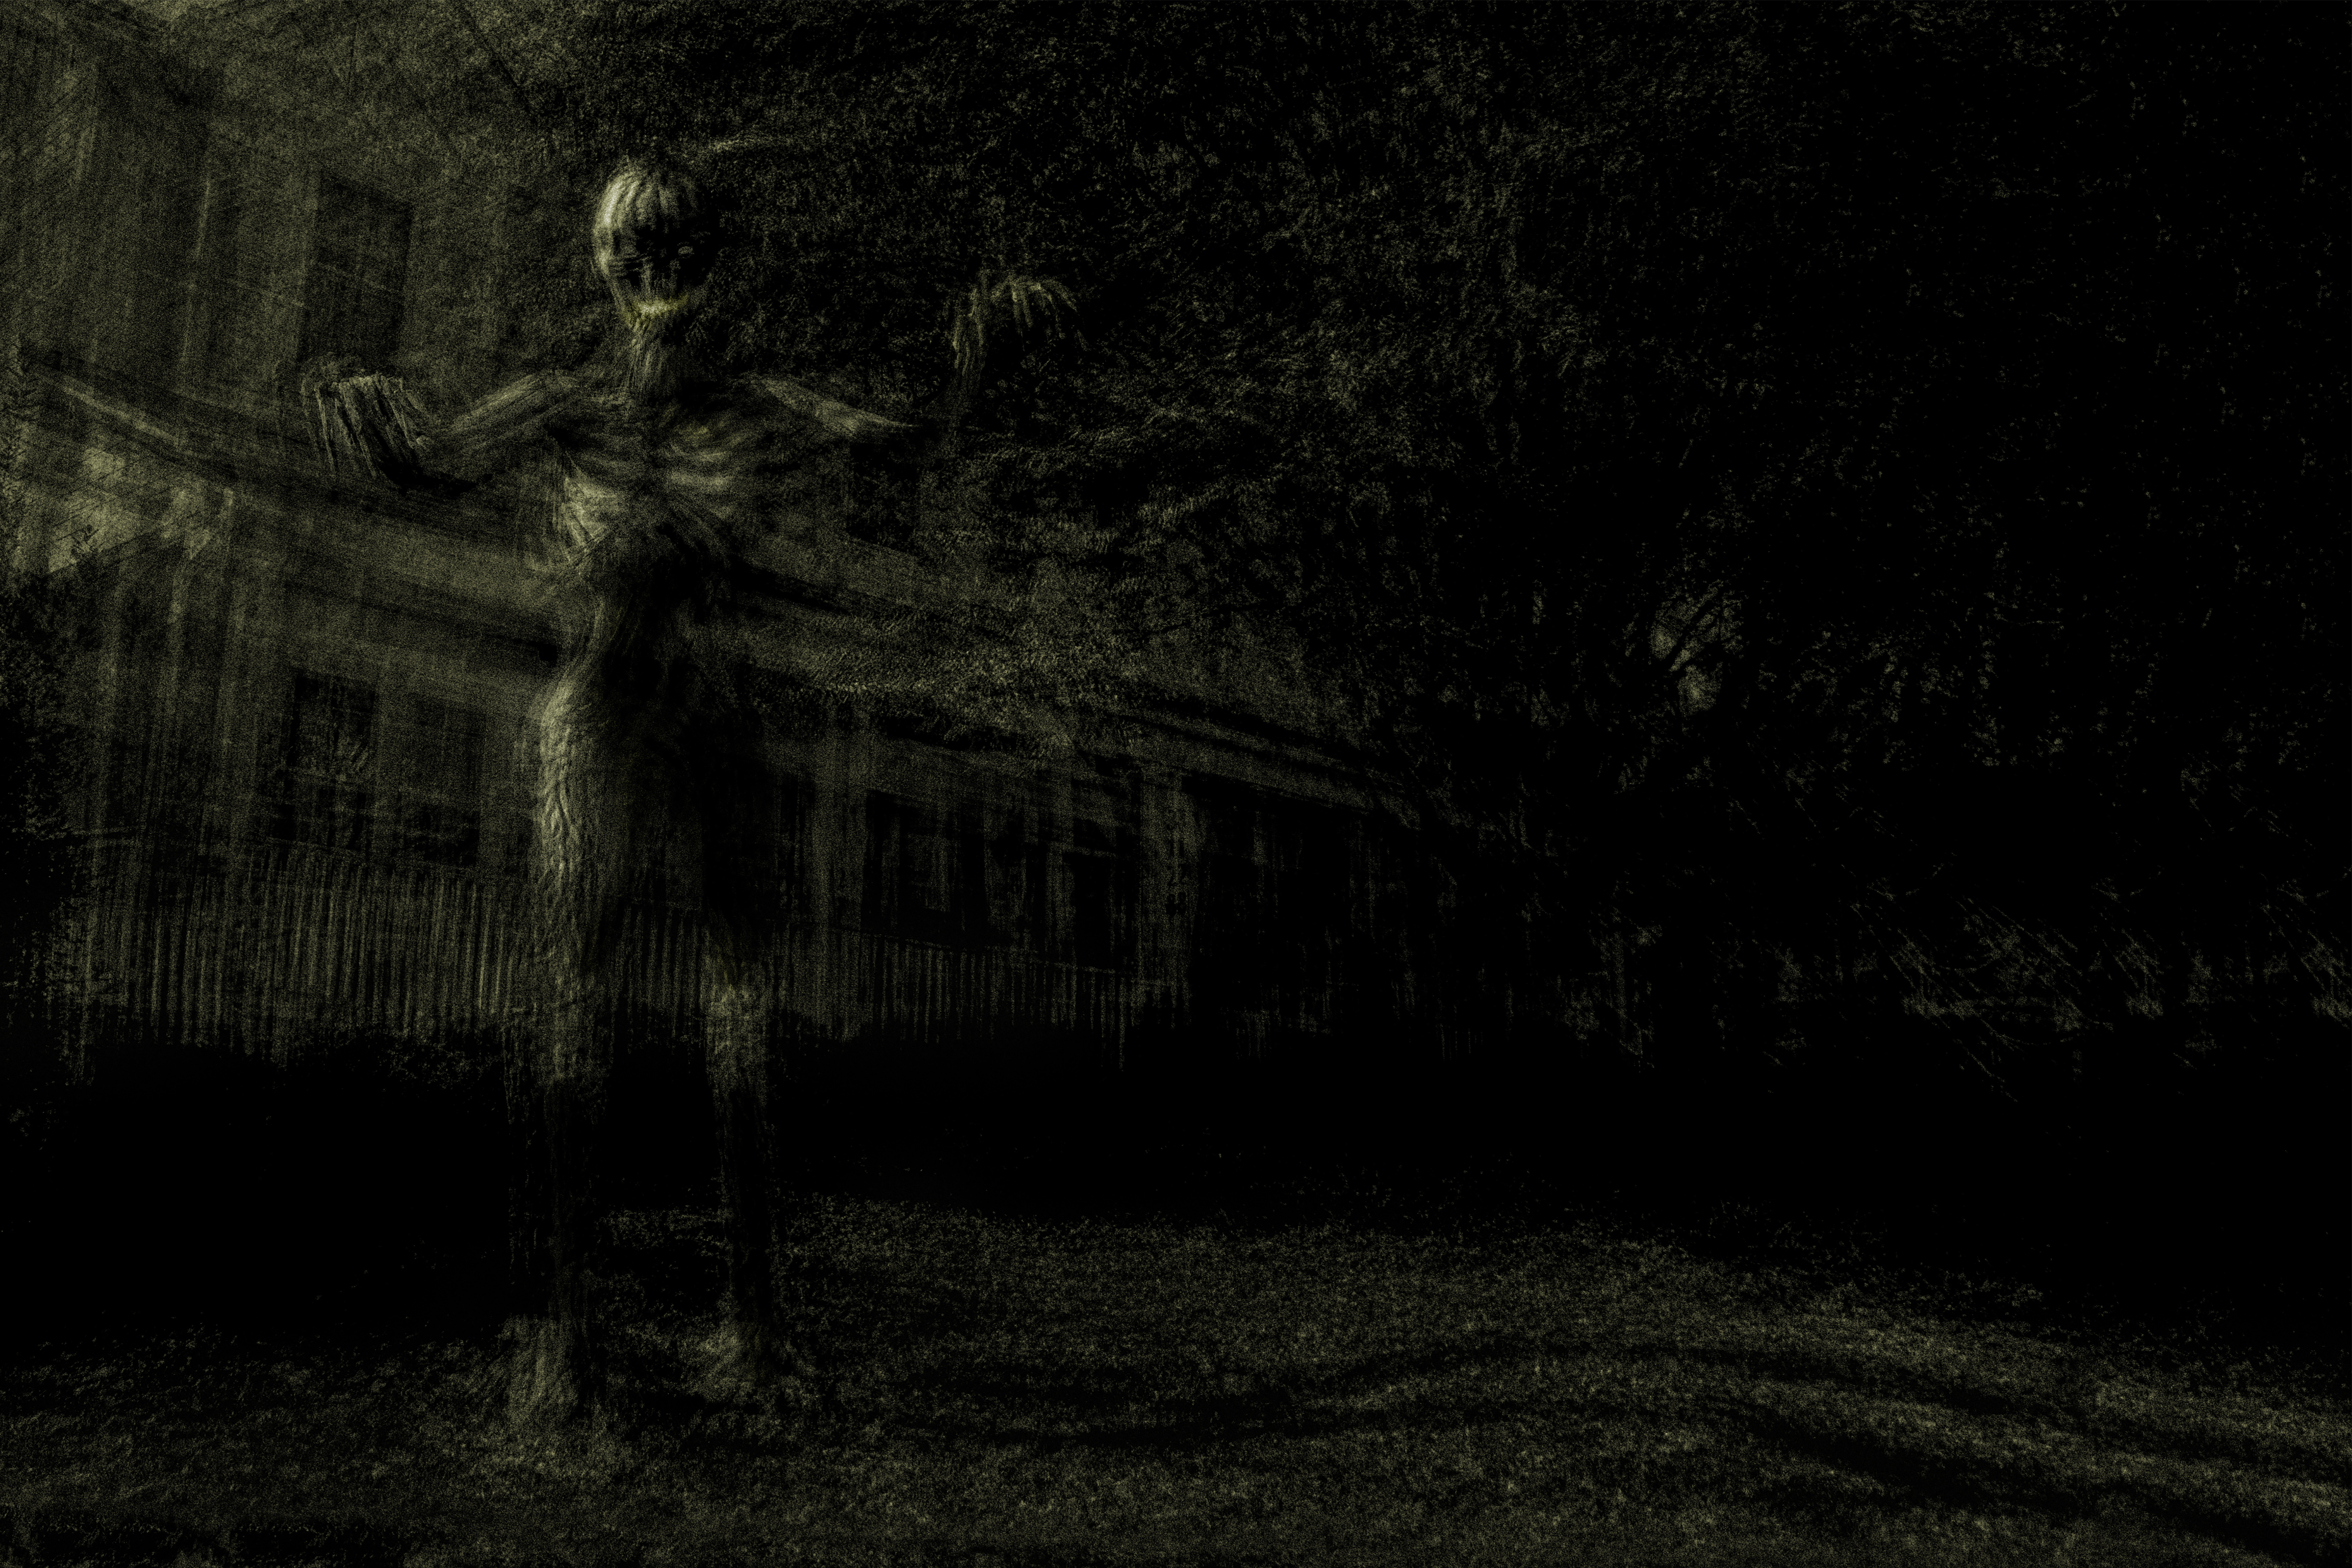
Later I tried to make a similarly-styled image from an otherwise-cartoonish Halloween decoration. I’m not sure if it works, but still thought I would share.
Third attempt: First try at pretty pictures
If you peruse Alan Brown’s beautiful work, it’s generally very peaceful and beautiful (although he riffs too). I don’t often lean in this direction when making images, but I thought I’d spend a bit more time for a change. So for my third attempt I actually drove away from the house(!) and strolled around for an hour. I highly recommend longer breaks anyway, once in a while at least, even if you don’t bring a camera (wait, what???). Anyway, this was my first effort:
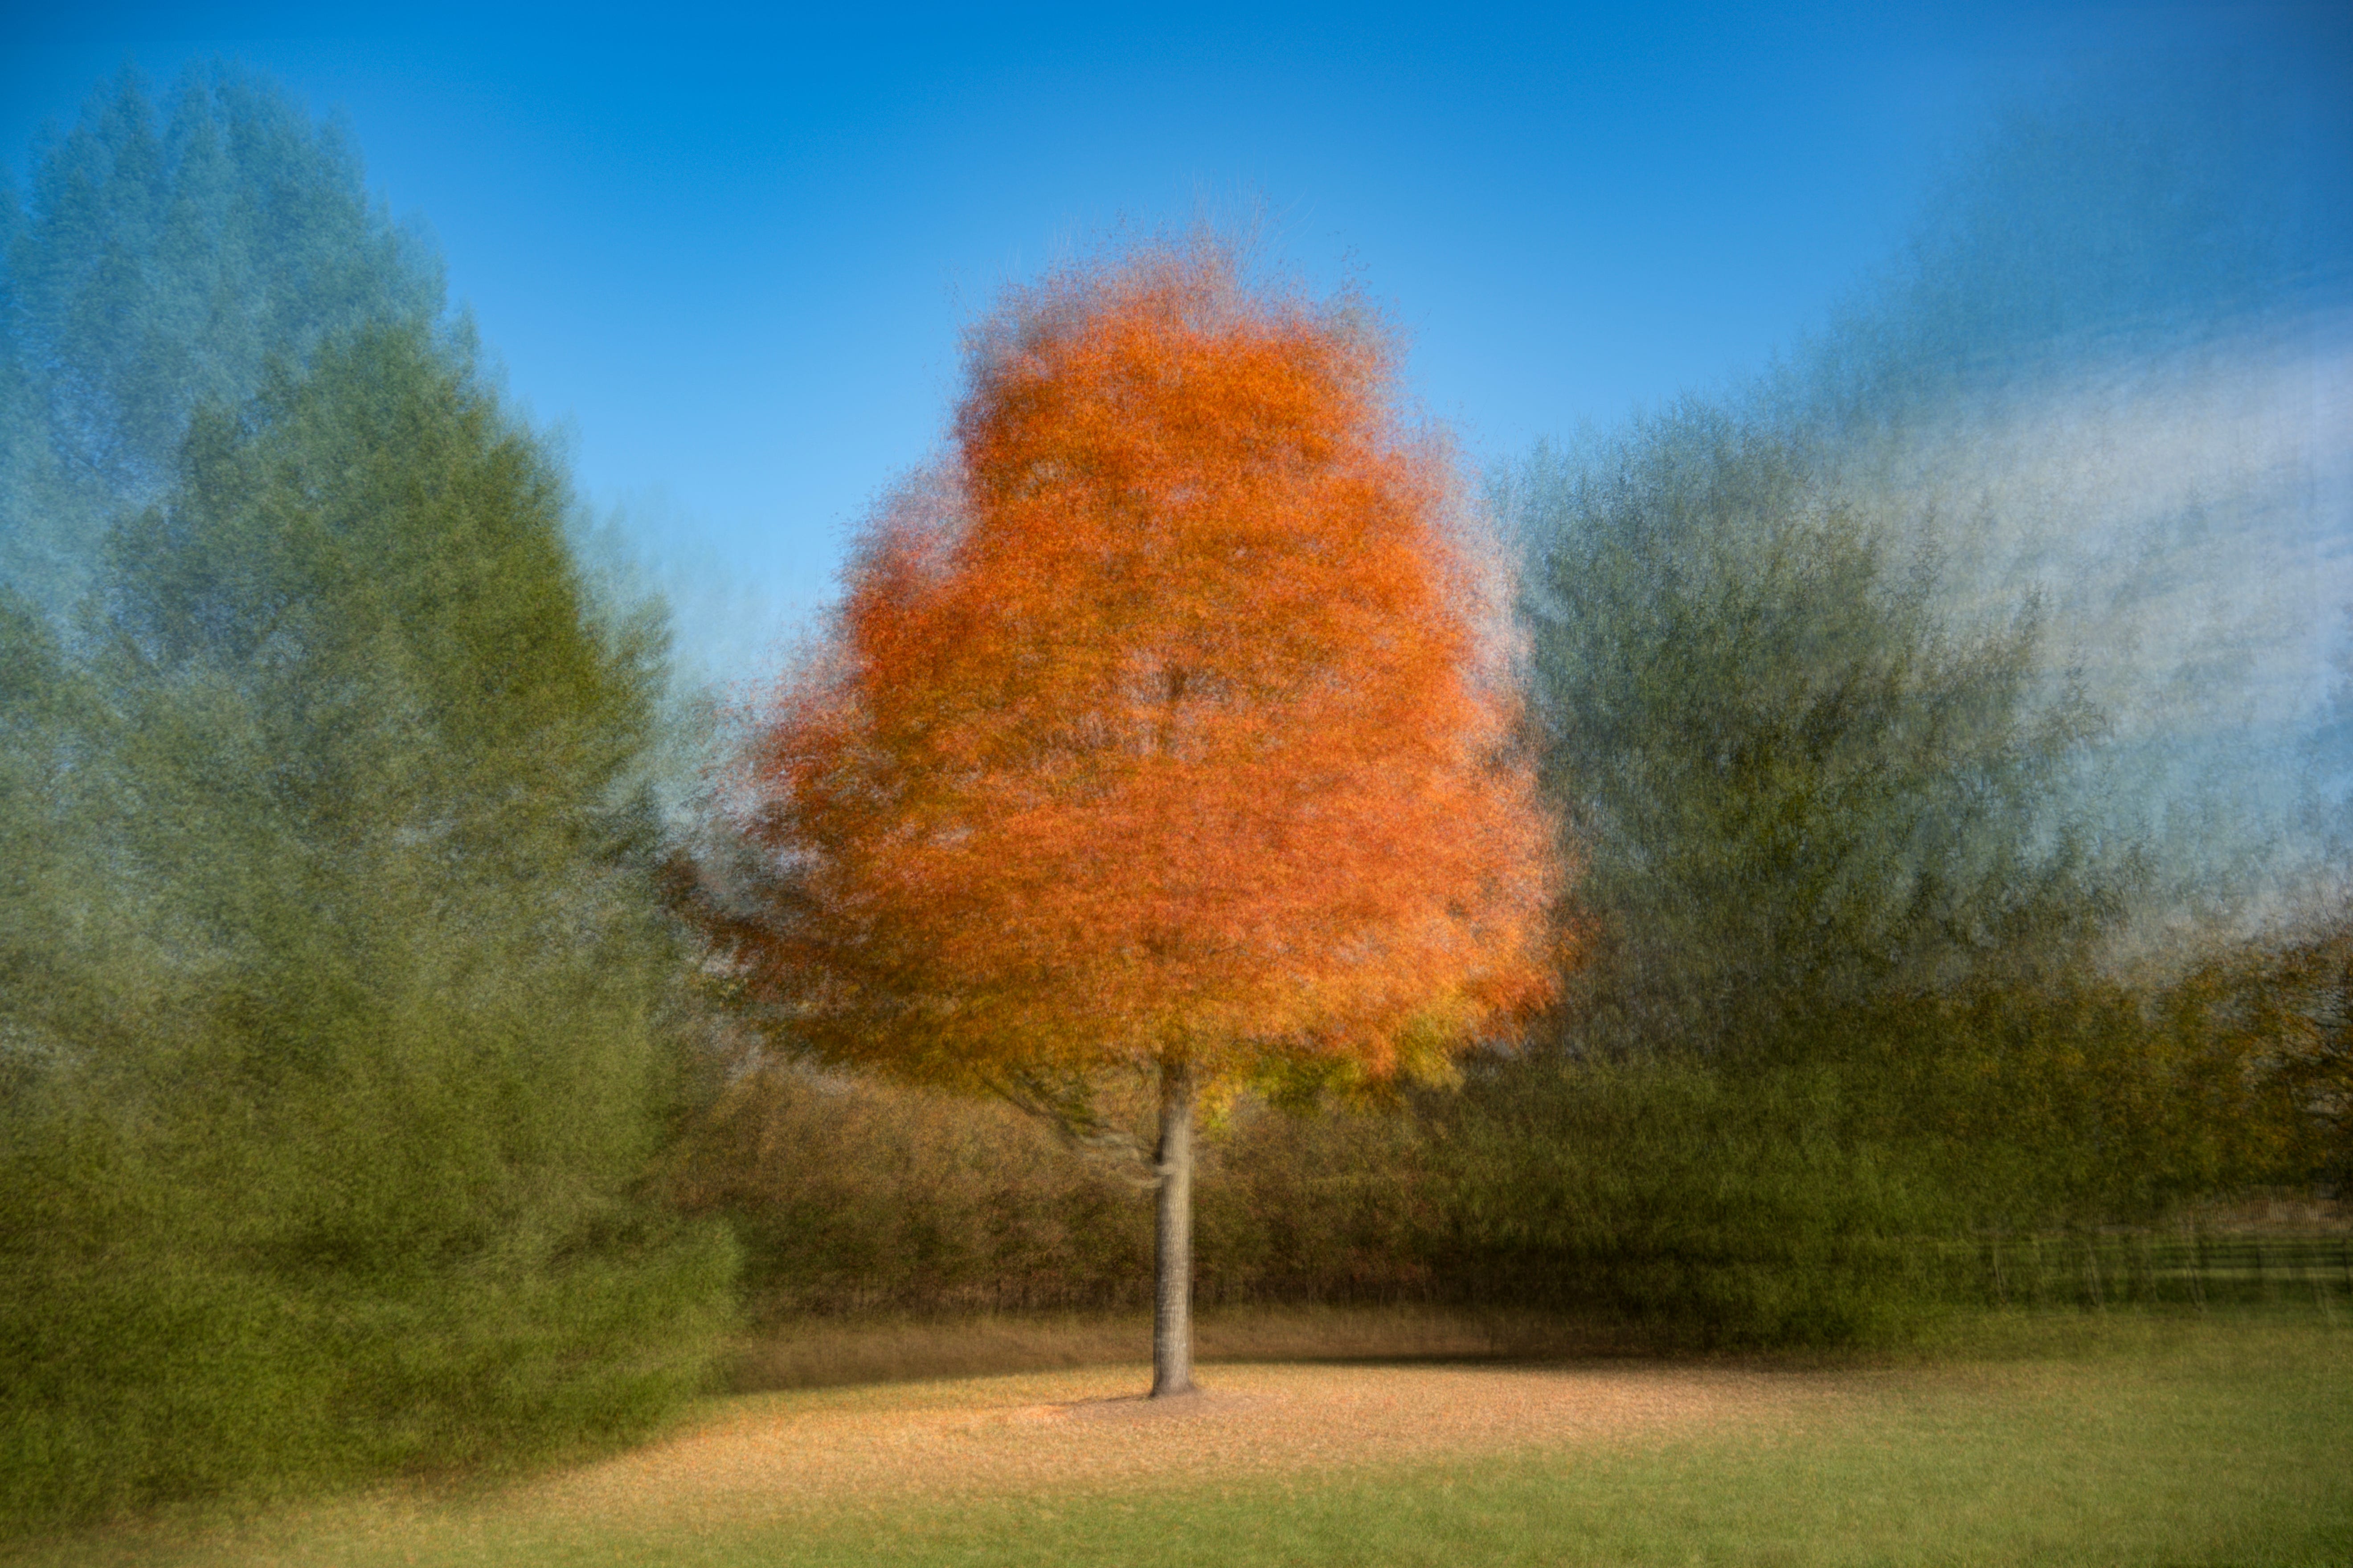
And I thought, not bad. And returned to my lists.
Six more in about a week
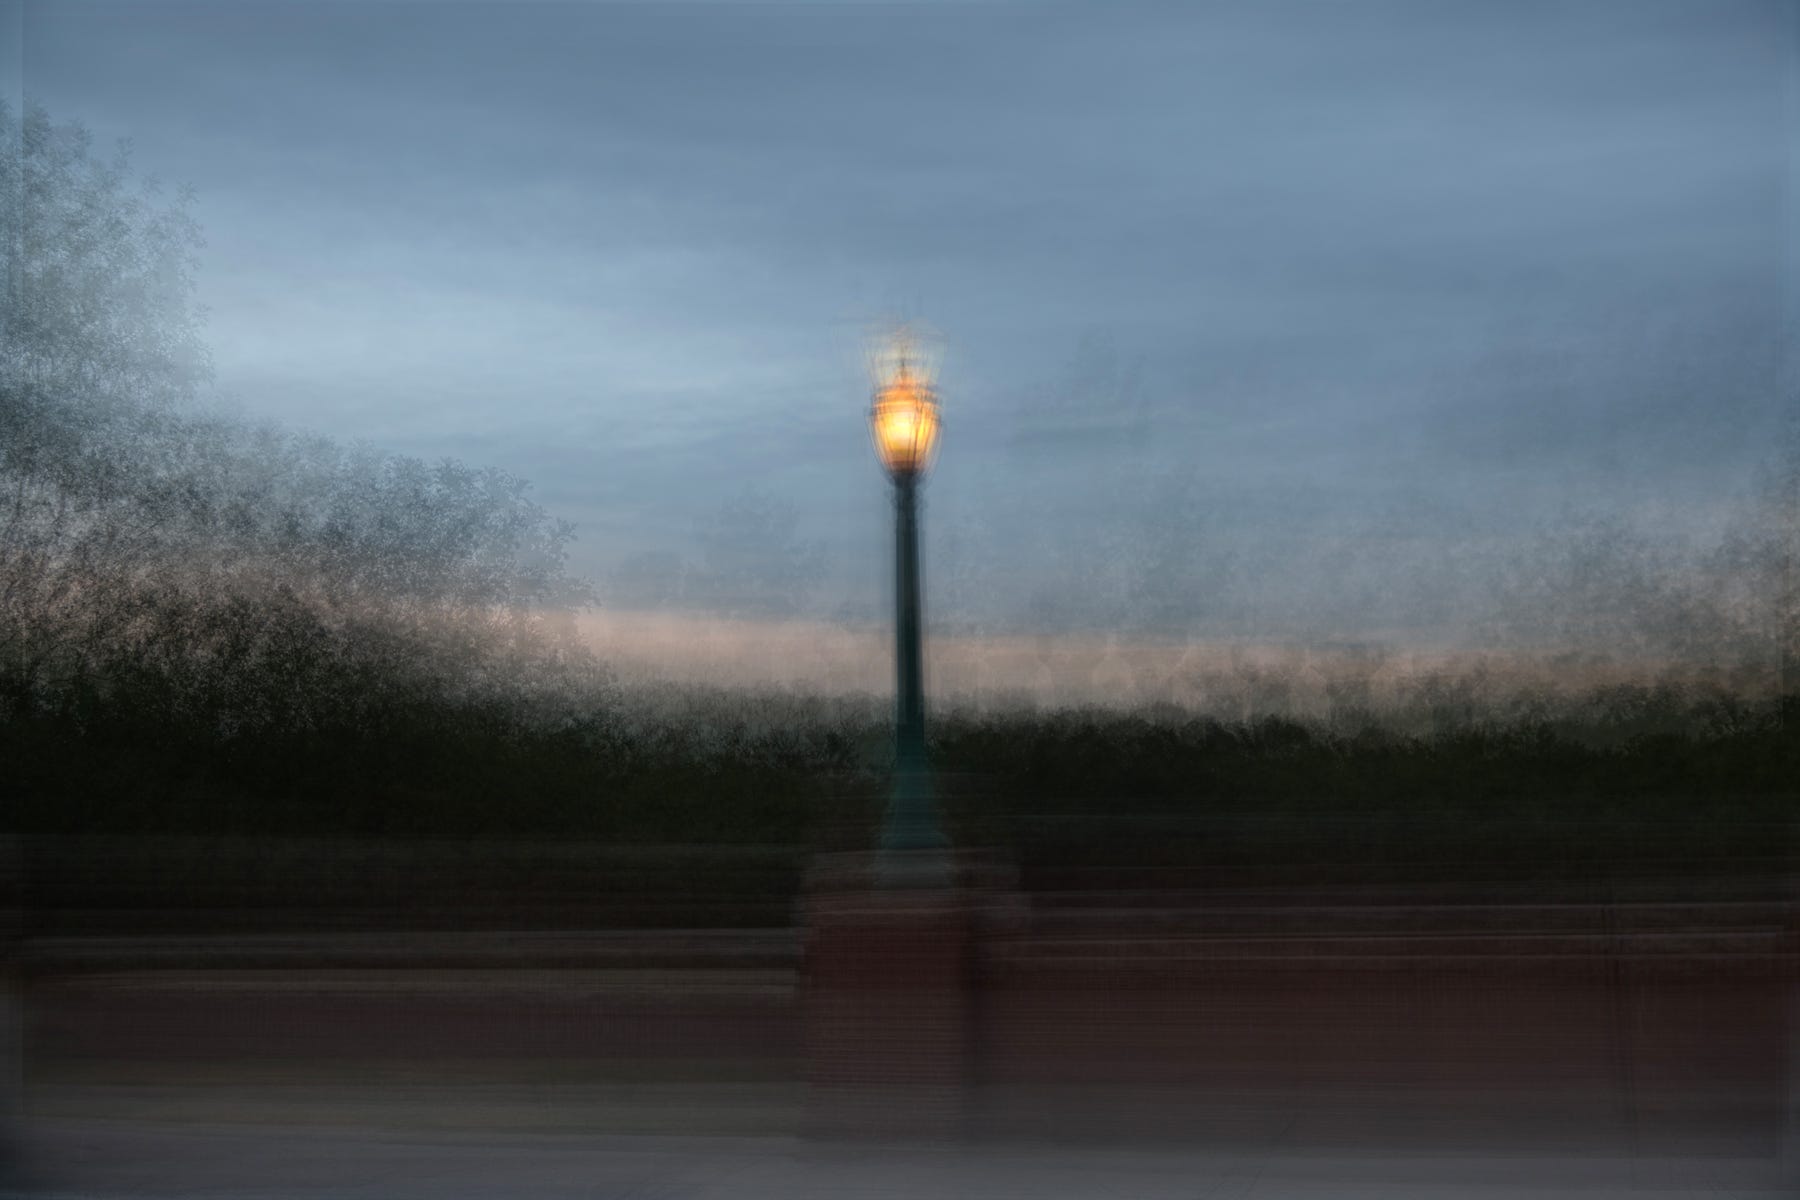
In the following days I made others. While in Texas I made this pair of lamppost images, along with the American Flag you might remember from last week’s election-related post.
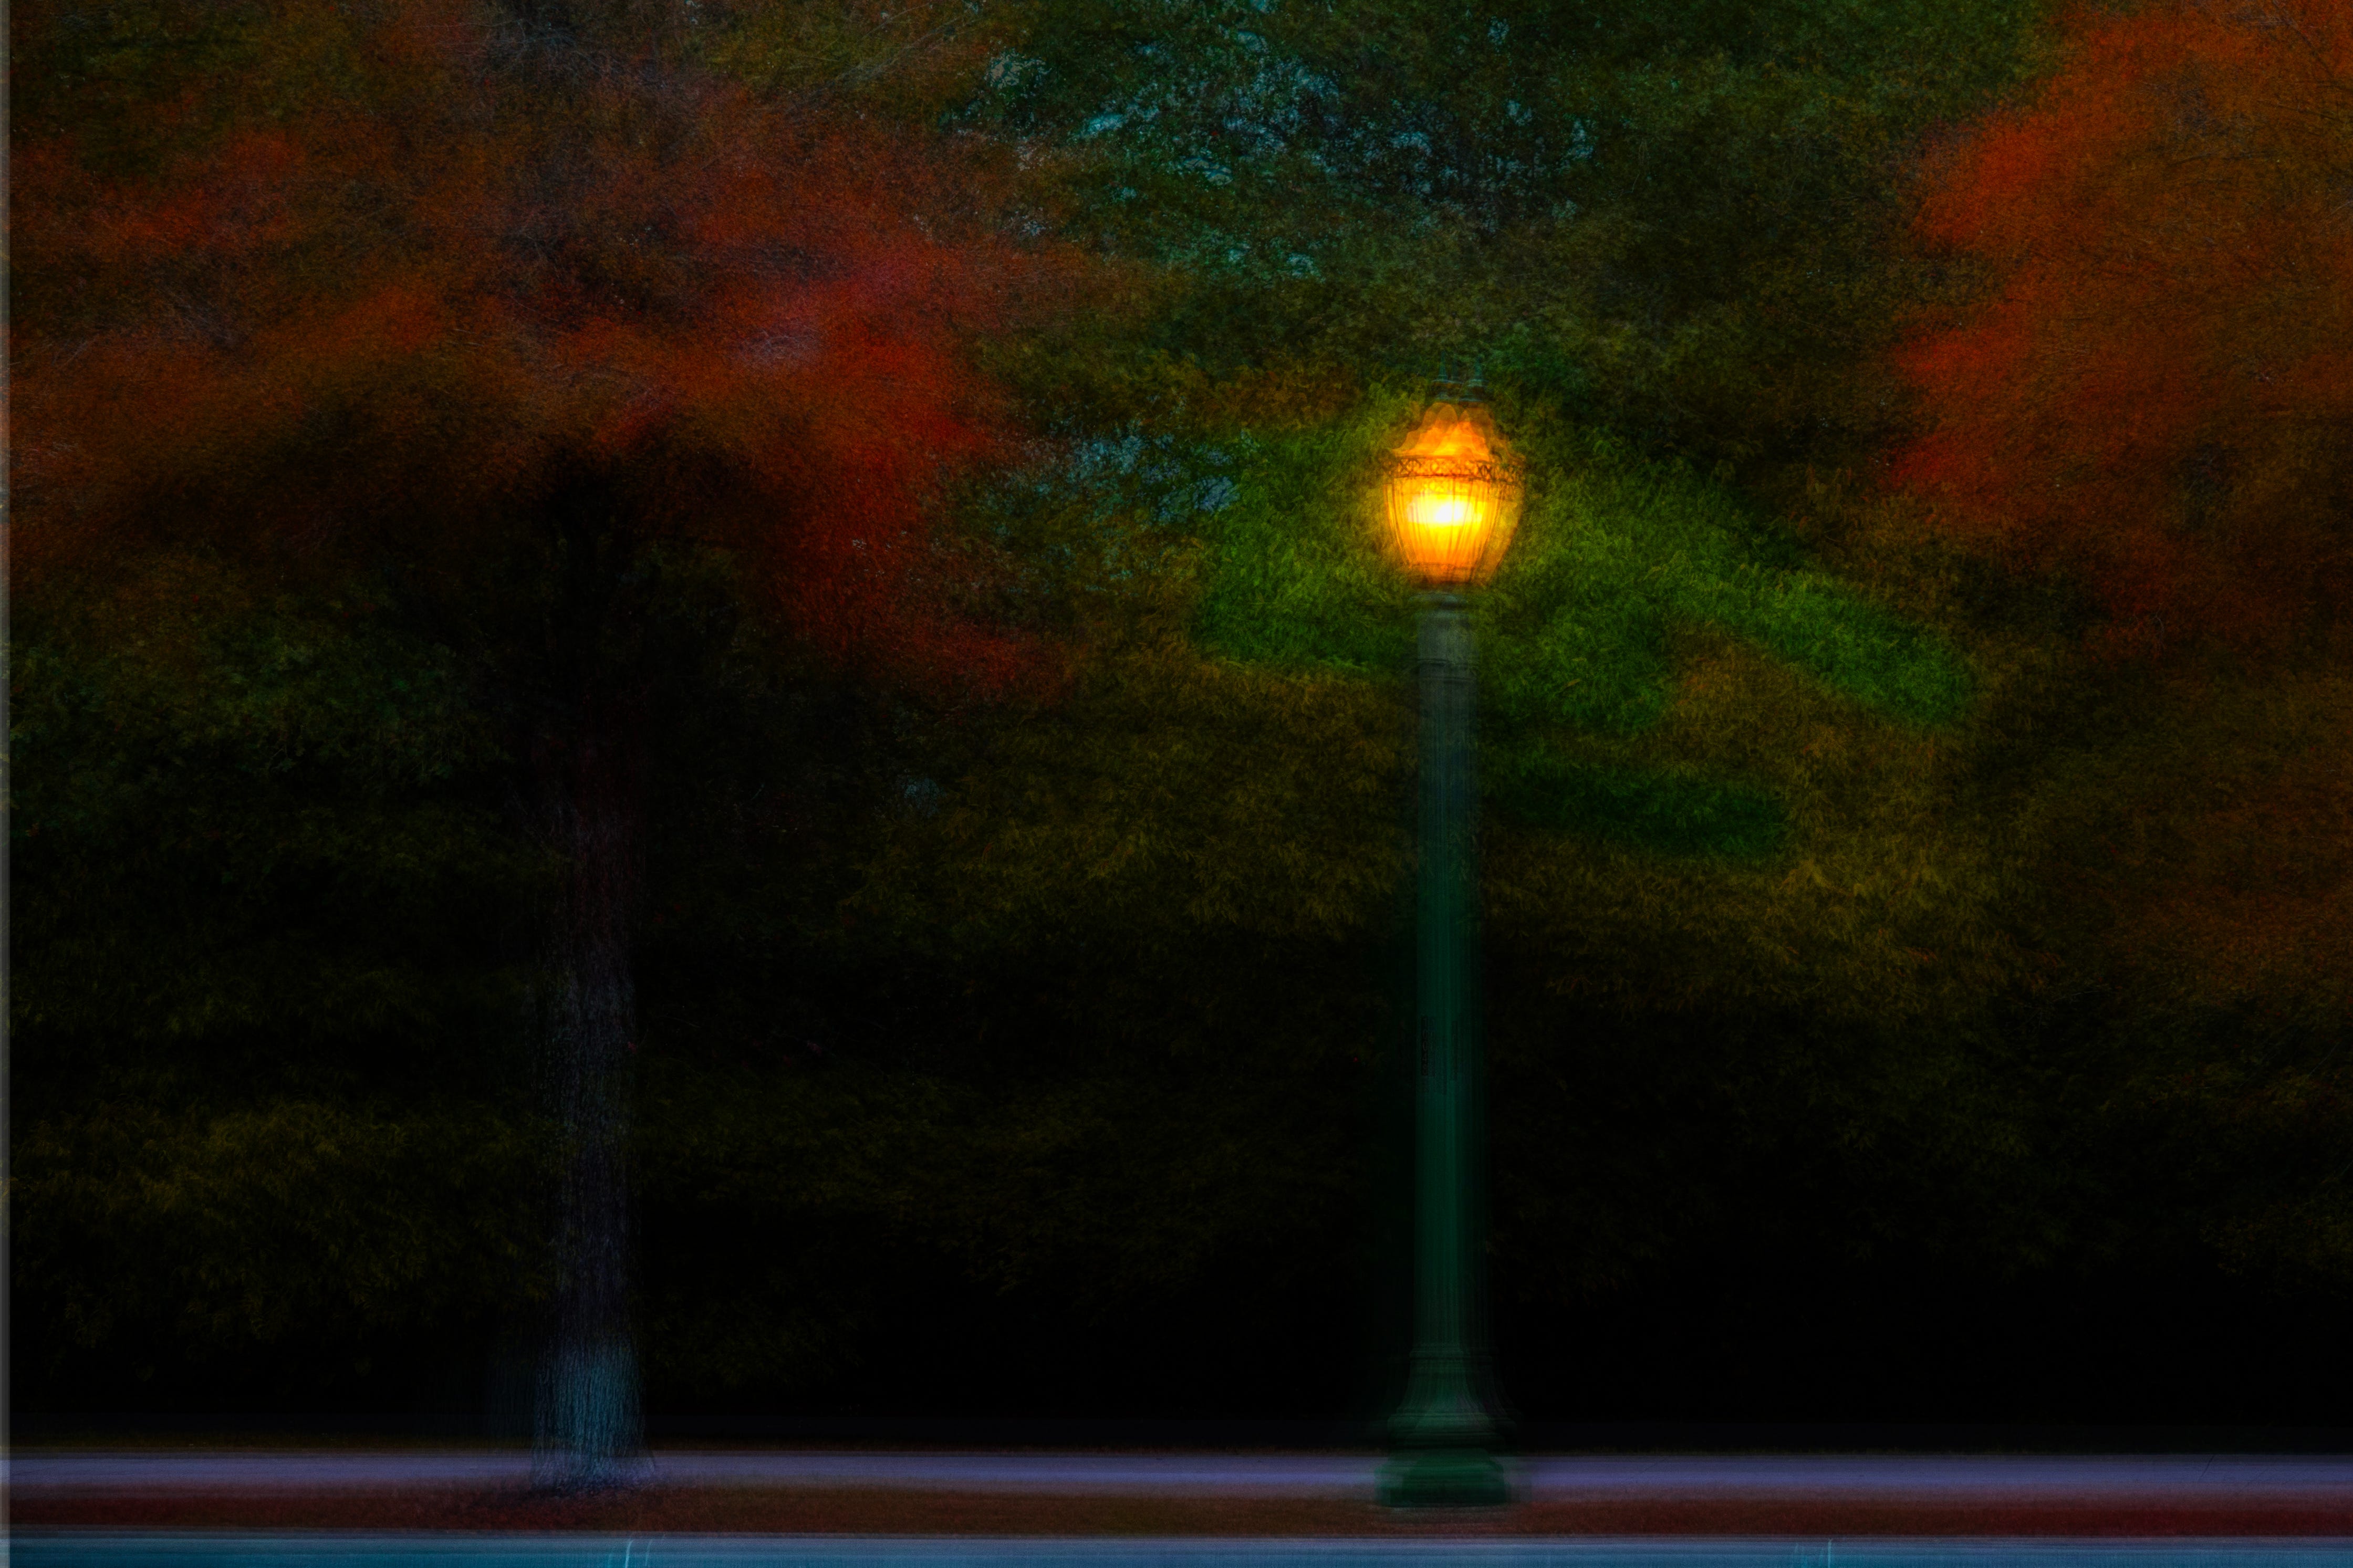
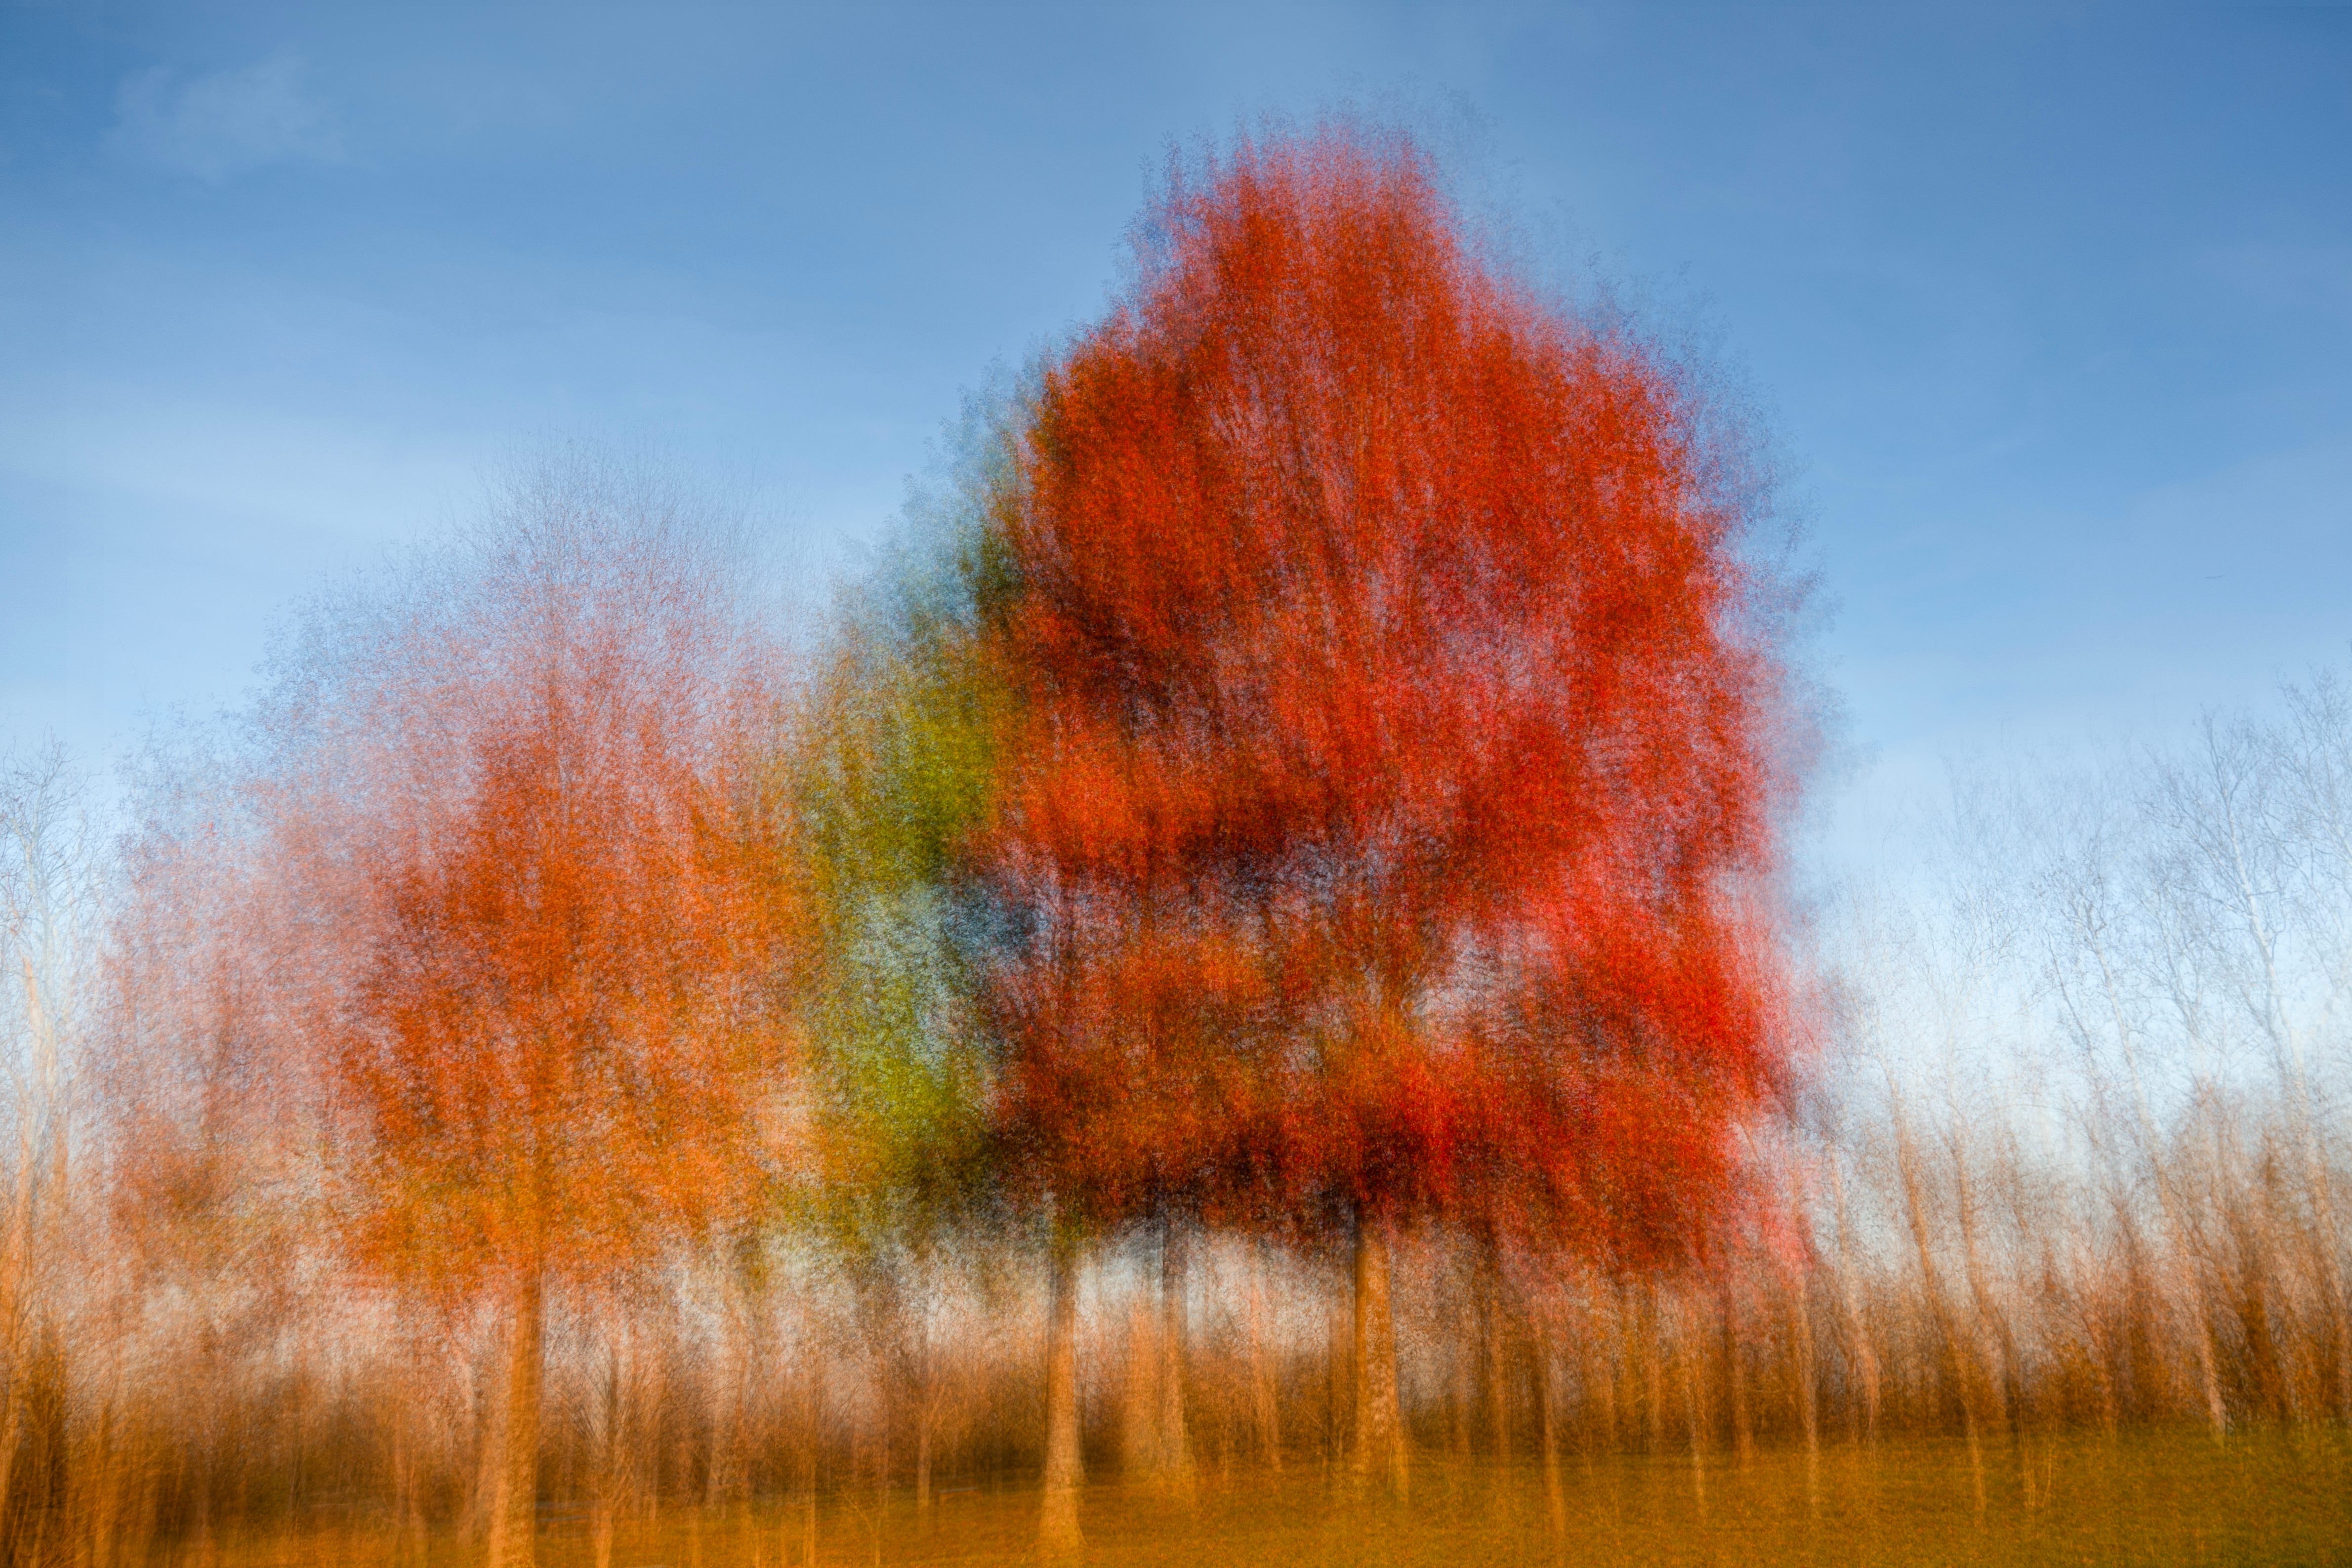
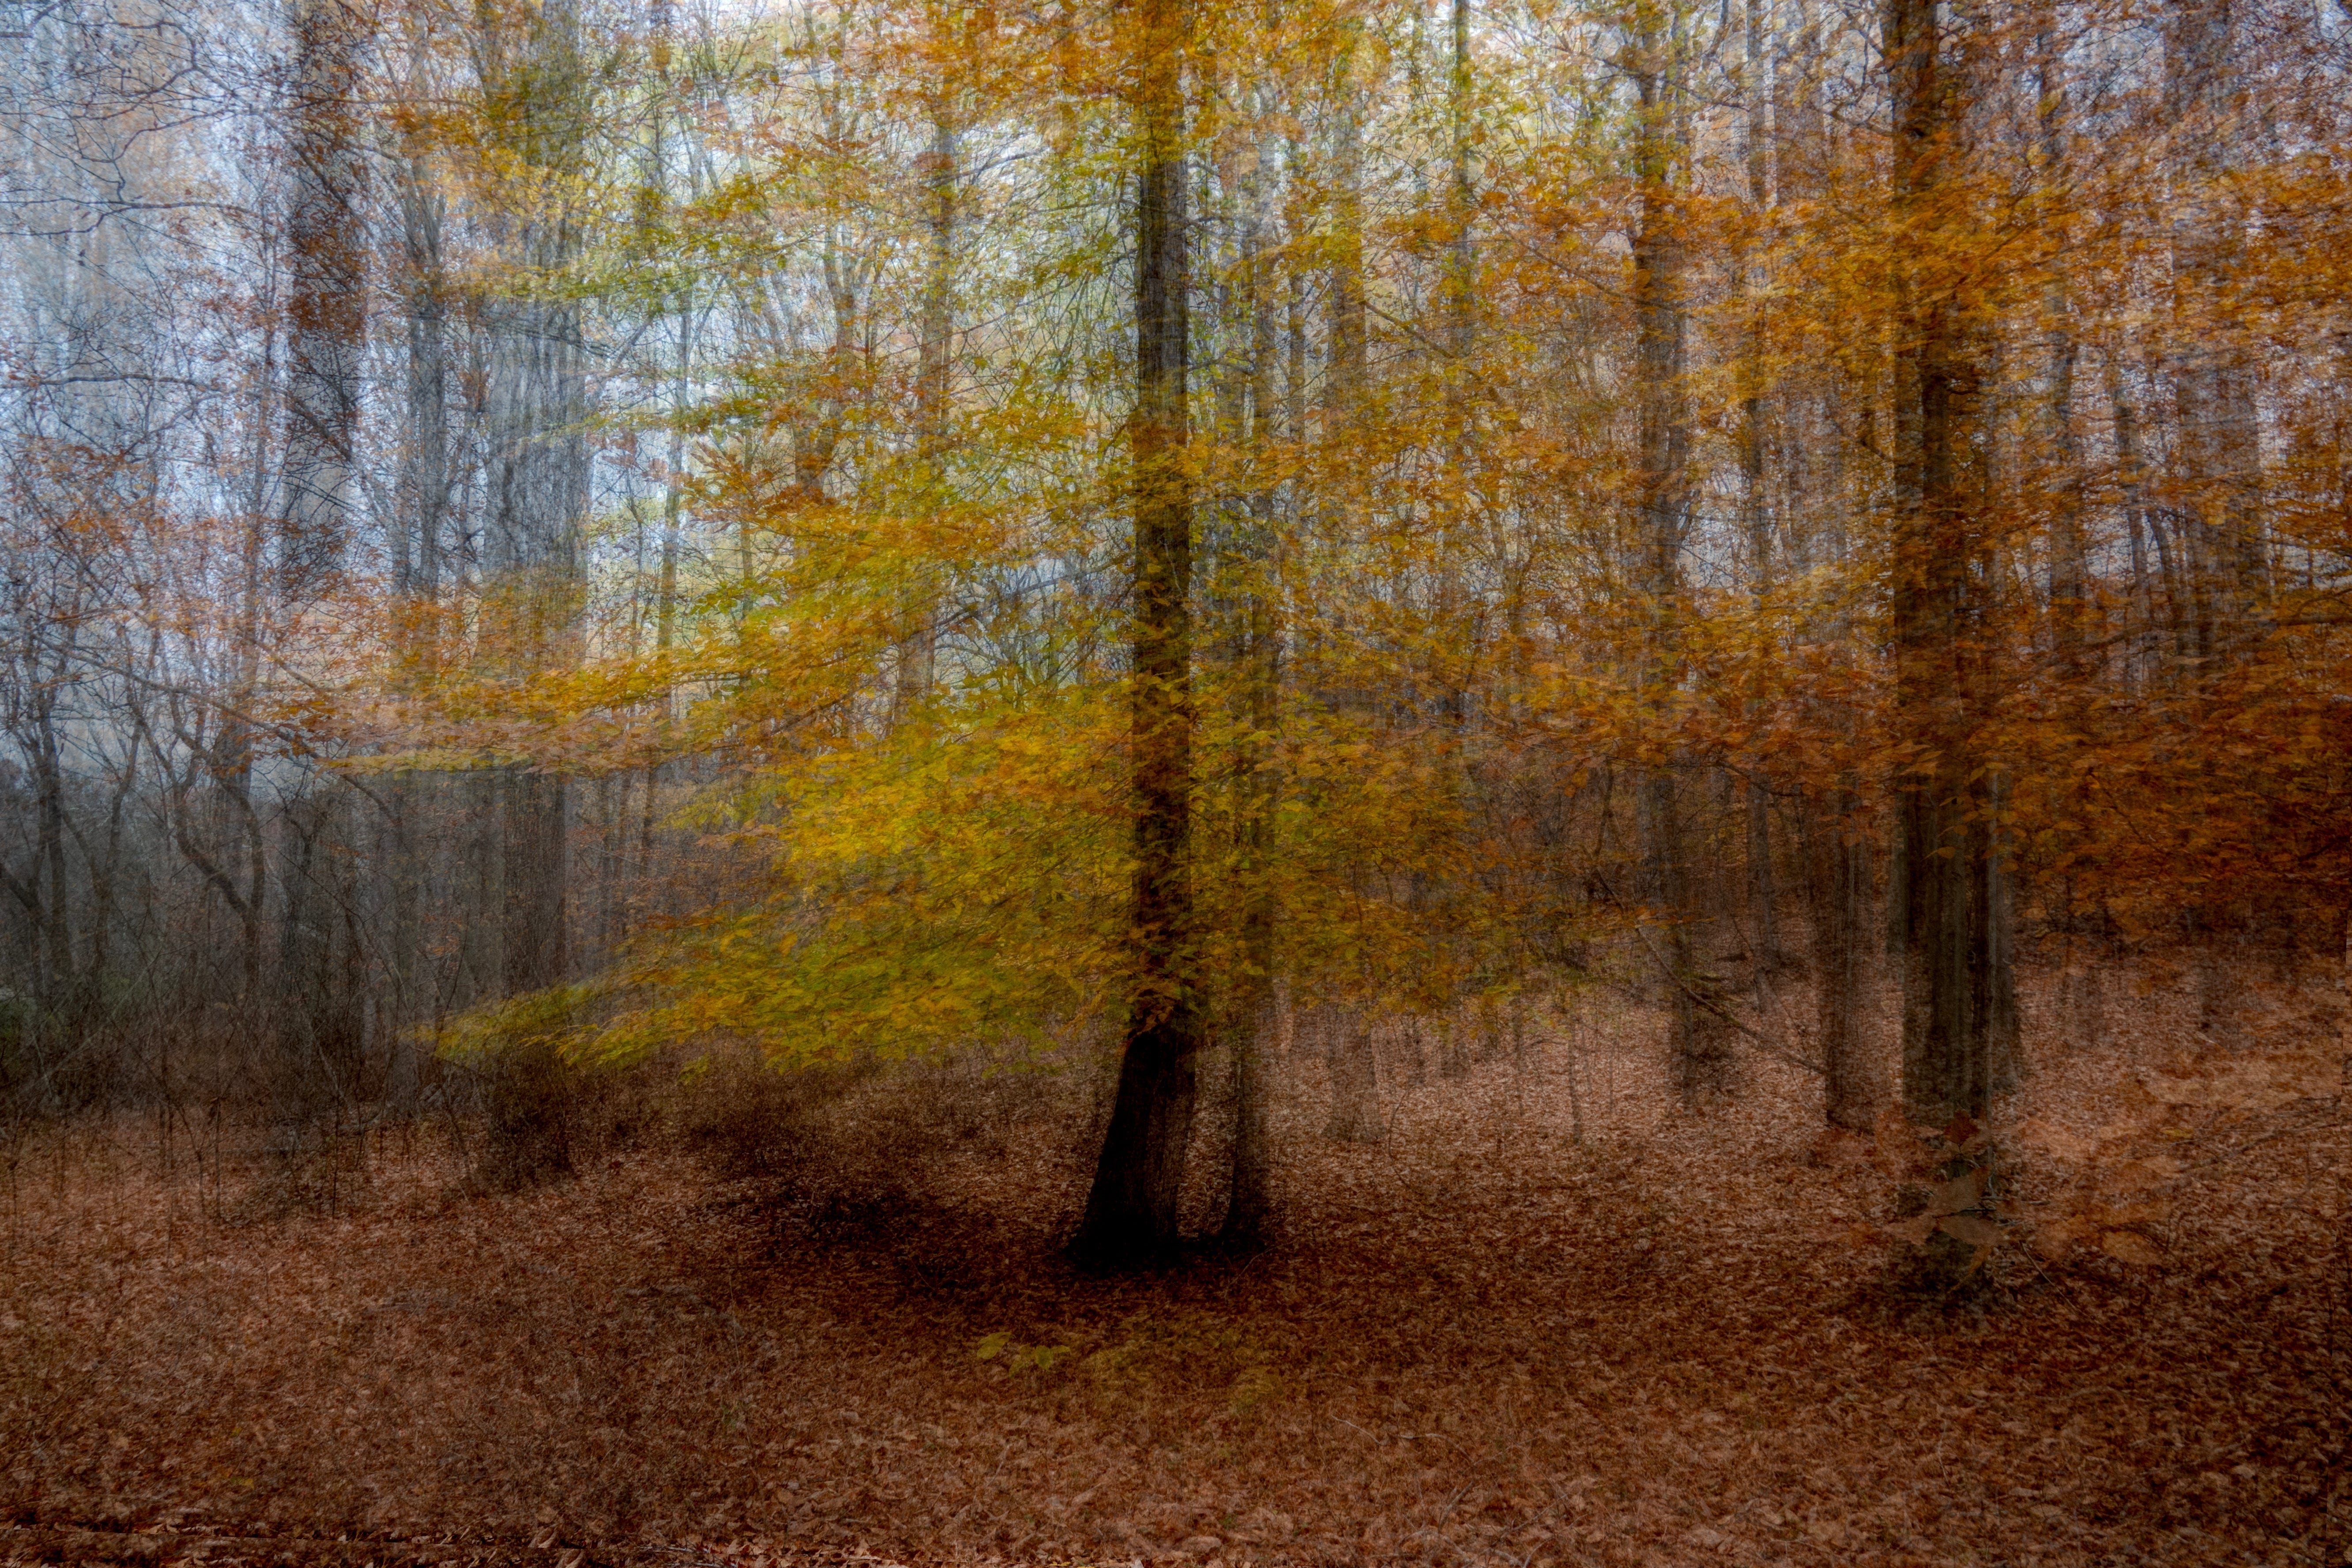
And then, encouraged by the results, I made a three more images when I returned to Virginia - these next two showing fall colors, plus the skeleton I showed you above.
It’s fun, right? It’s been a great chance to learn something new, and to play for the sake of playing. Didn’t take long, and it provided me several starting points if I decide to pursue any of these directions to make a body of work.
All while getting unblocked.
Win-win-win!
Until next time,

P.S.: Thanks again to Alan Brown’s generous how-to descriptions; I’ll provide the link one more time here. If you try it yourself, I’ll warn you that I could NOT get his Lightroom step to work, opening all the files as layers. But I WAS able to do it from Bridge, another application in Adobe’s creative pack. In Bridge, from the top row of drop-downs, Tools —> Photoshop —> Load Files into Photoshop Layers.
Is there something here you like or dislike? Questions? Have anything else to say? Let us all know by clicking on the Comments button below, and express yourself. Don’t be shy, now.
If you like this post you’re bound to like the next one as well. I’m sending them weekly. Quit any time, or better yet, stay and read on!
Know anybody who should hear about all this? Be a friend and let them know!
Or, are you interested in seeing more work? My website welcomes you. We may even want to work together. I promise a joyous and productive experience if we do.
When i was stuck last November, I hit my neighborhood at night experimenting with HDR on various subjects. Long exposure would have provided me with better images, but like you, I was stuck creatively and was not looking for great images: I was looking to get unstuck. The process led to a free discoveries and accidentally led me to a new way (for me) to process images between LR and Photoshop that I continue to use on occasion to this day. I'm grateful for the interruption to my normal way of shooting. It we great brain/creativity therapy, as you have described here. I'm looking forward to giving this a shot now. Thanks for the post!
very interesting! and oh, thanx for the shoutout!